How to Create an Appointment in Invent ERP?
How to Create an Appointment in Invent ERP?
Creating an appointment in Invent ERP is simple and helps you track services for your customers. It keeps pricing and tasks consistent, makes your workflow more efficient, reduces no-shows, and helps your business run smoothly resulting in improved customer satisfaction.
Step-by-Step Process
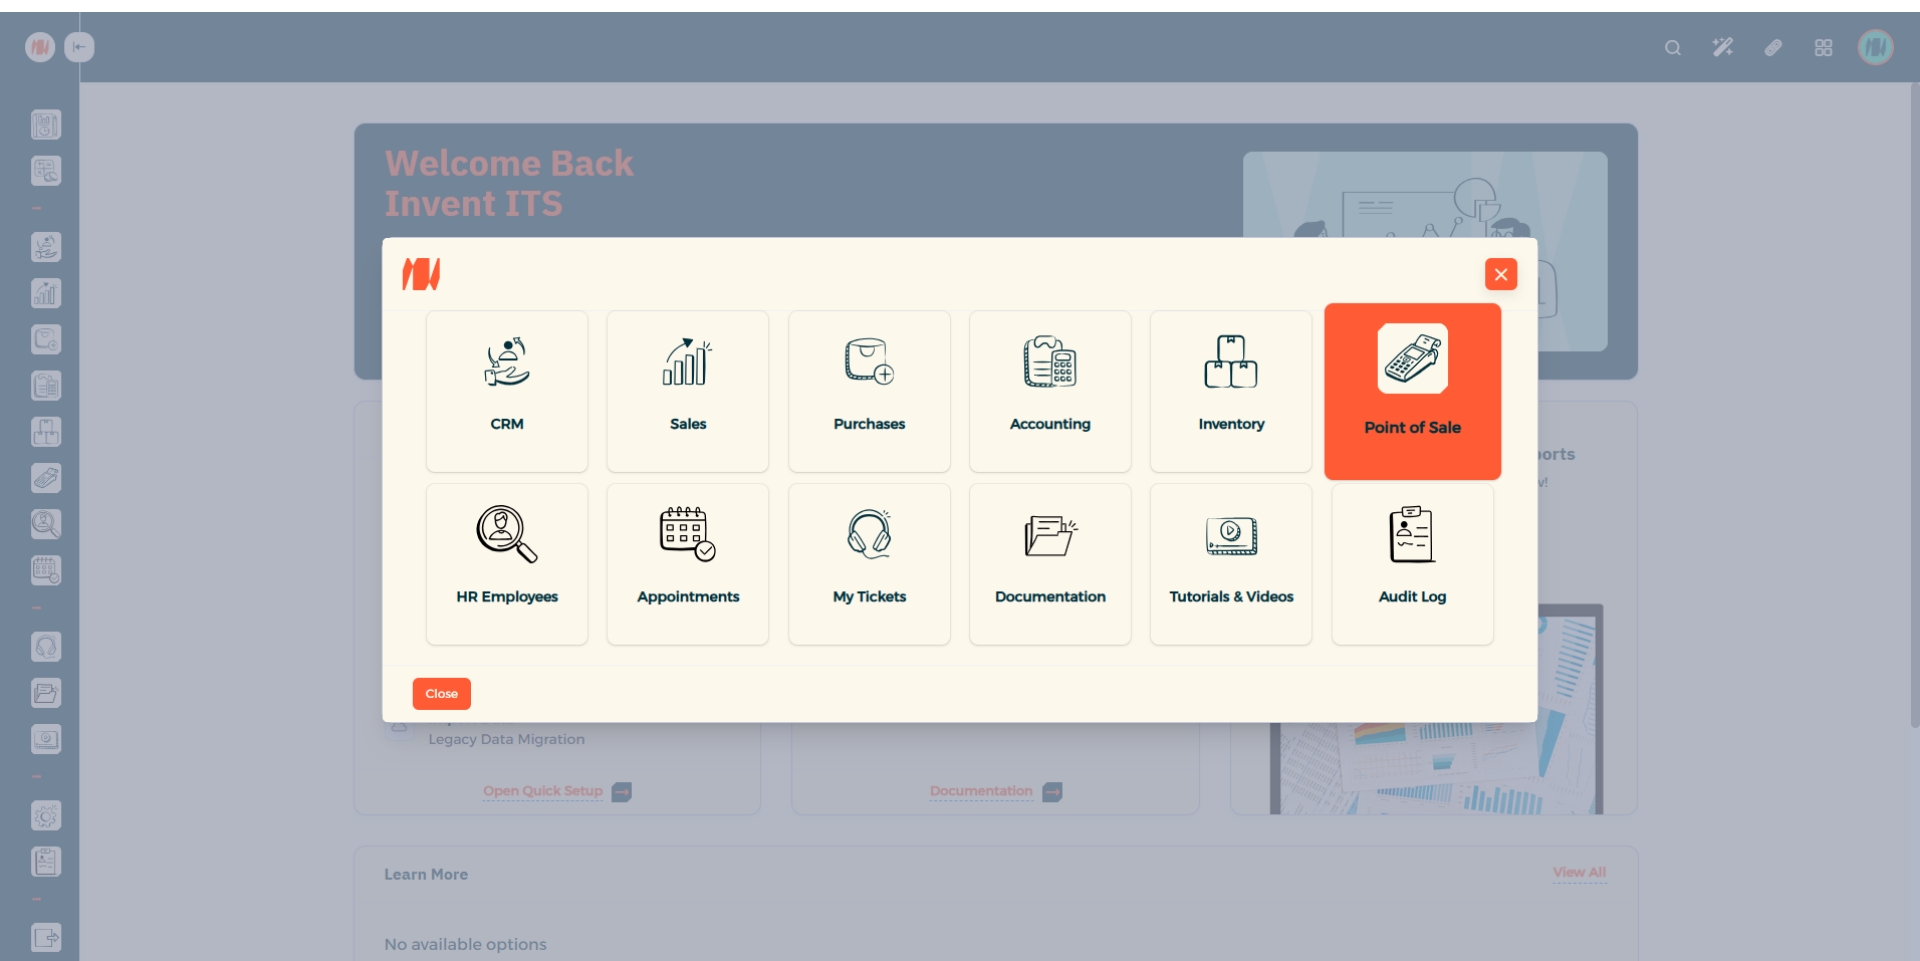
Step 1: Navigate to Point of Sale
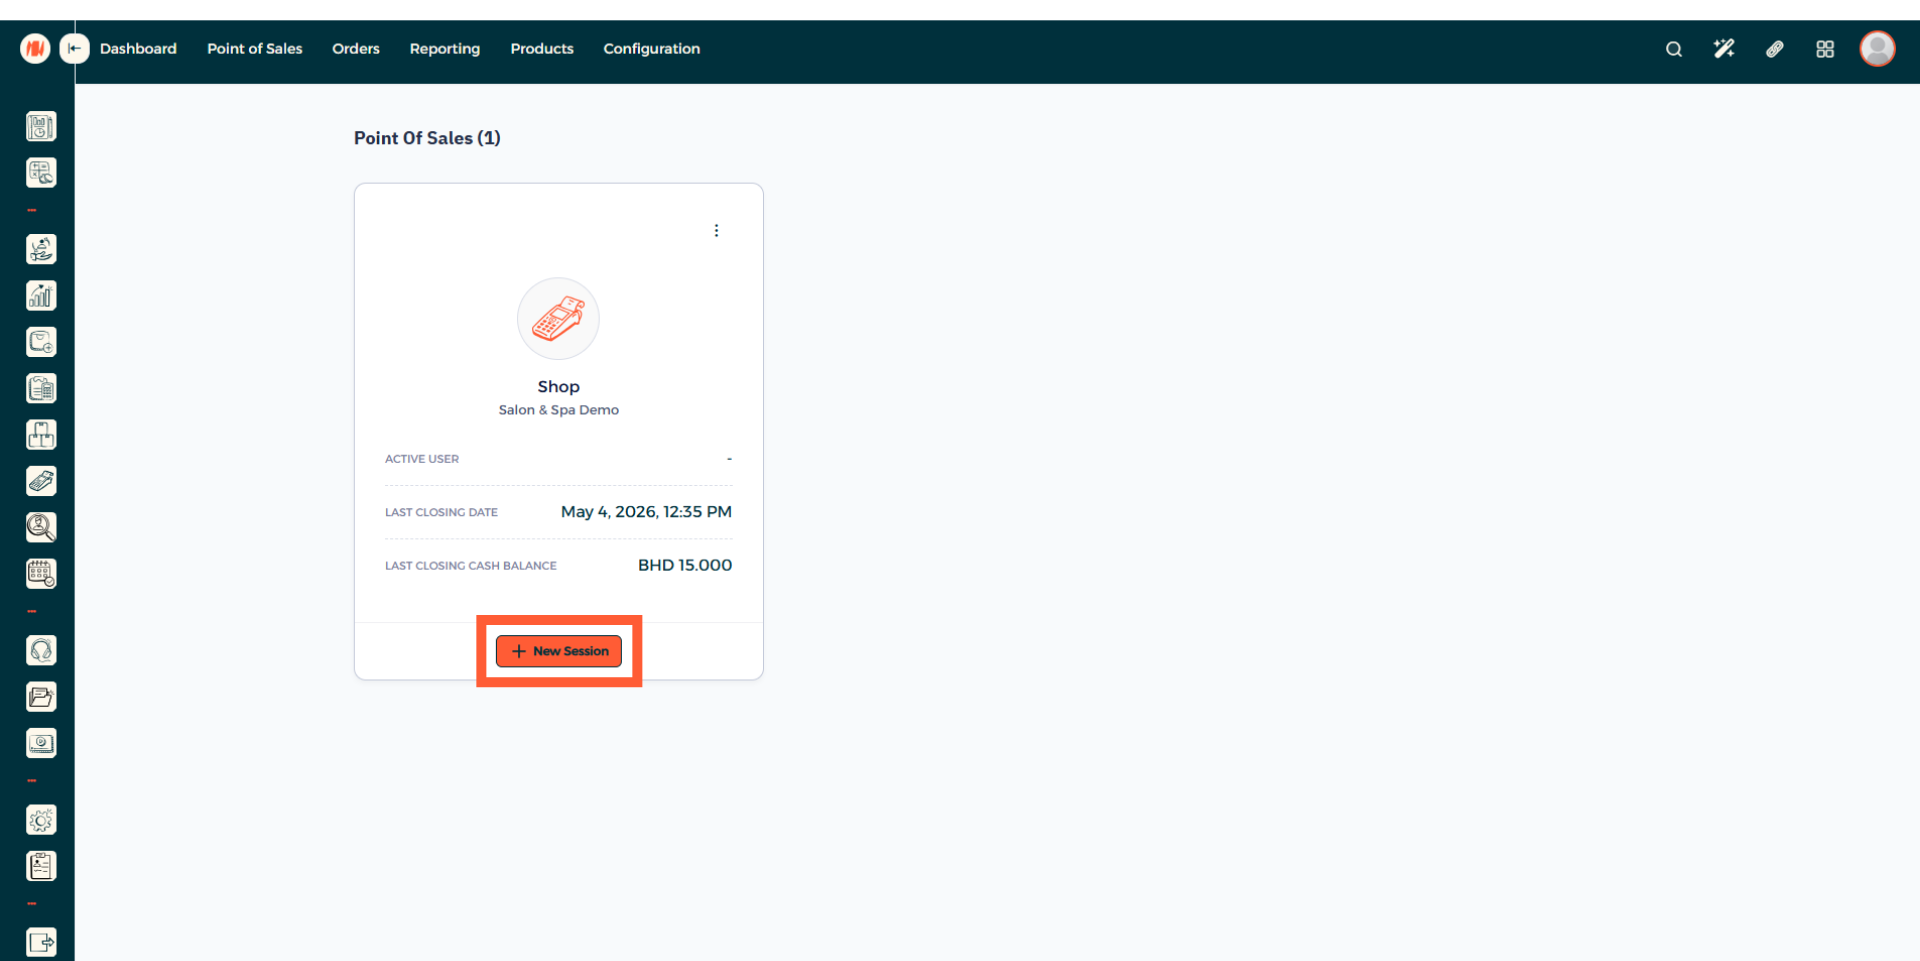
Step 2: Open a new Point of Sale Session
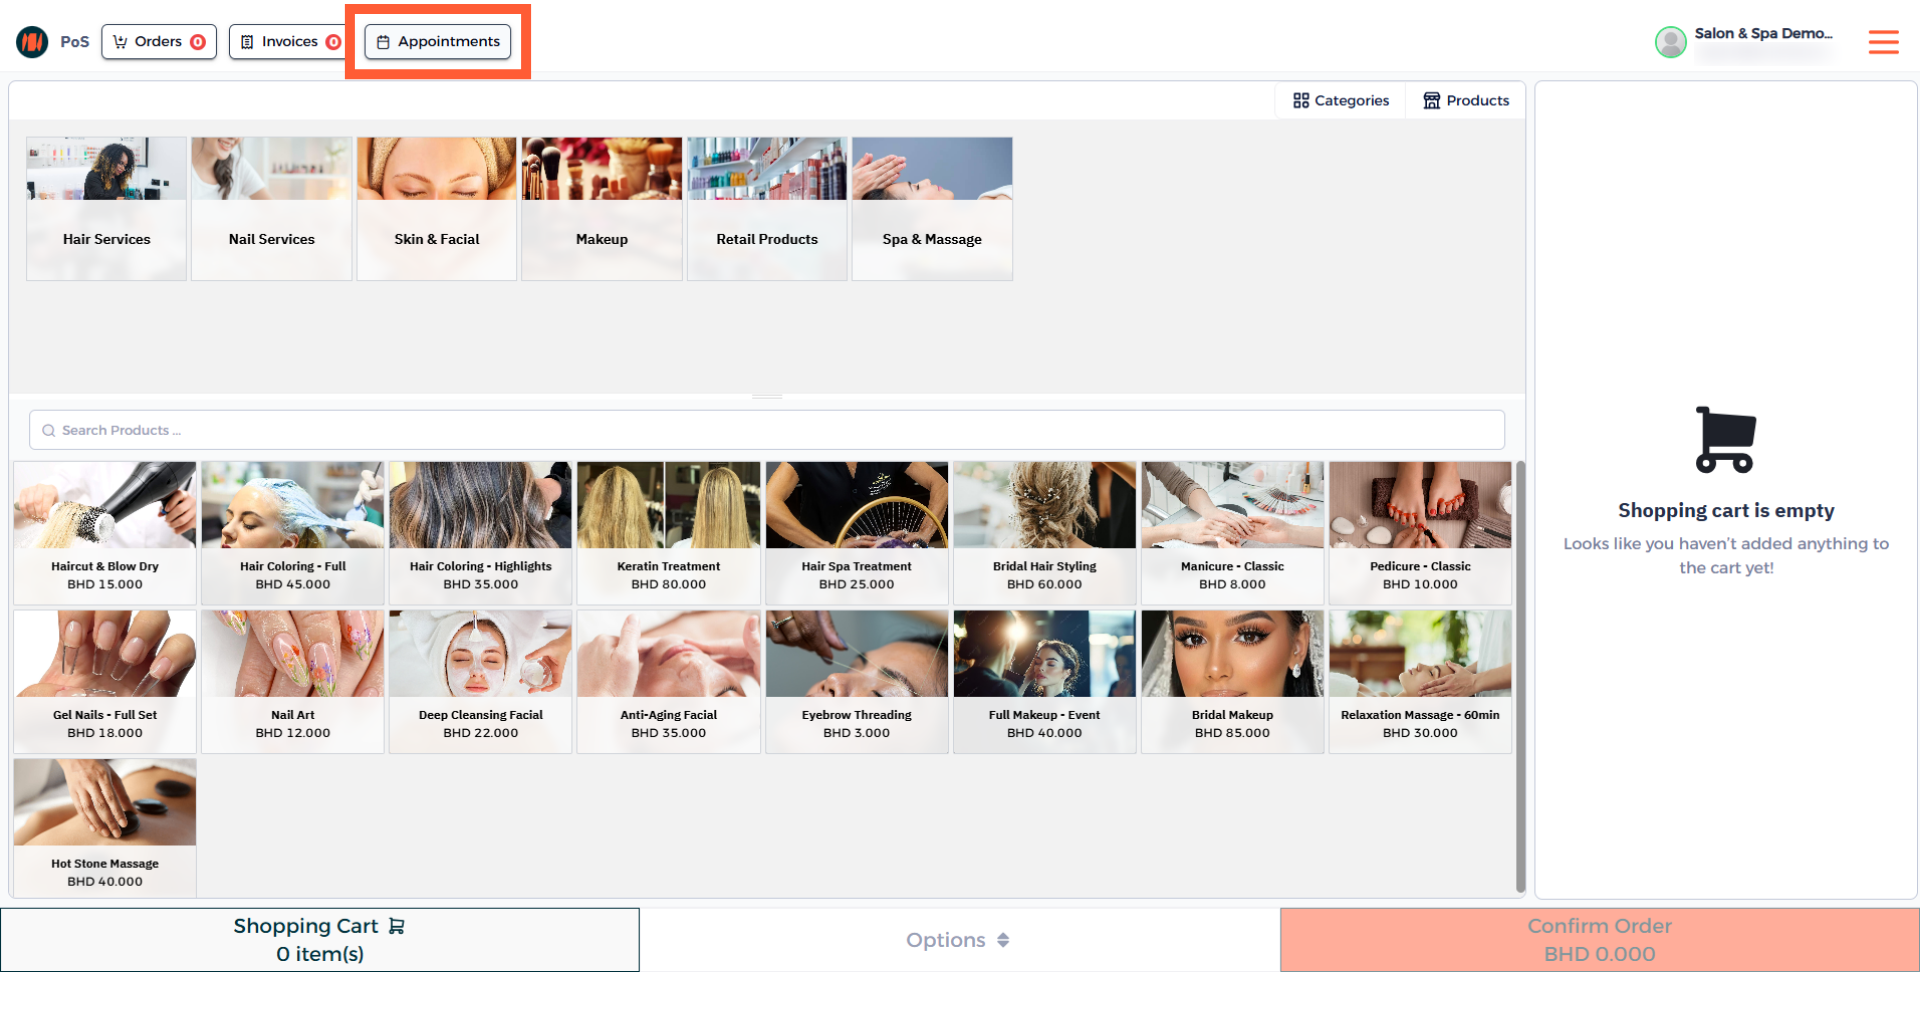
Step 3: Head to Appointments
In your POS session, on top click on Appointments.
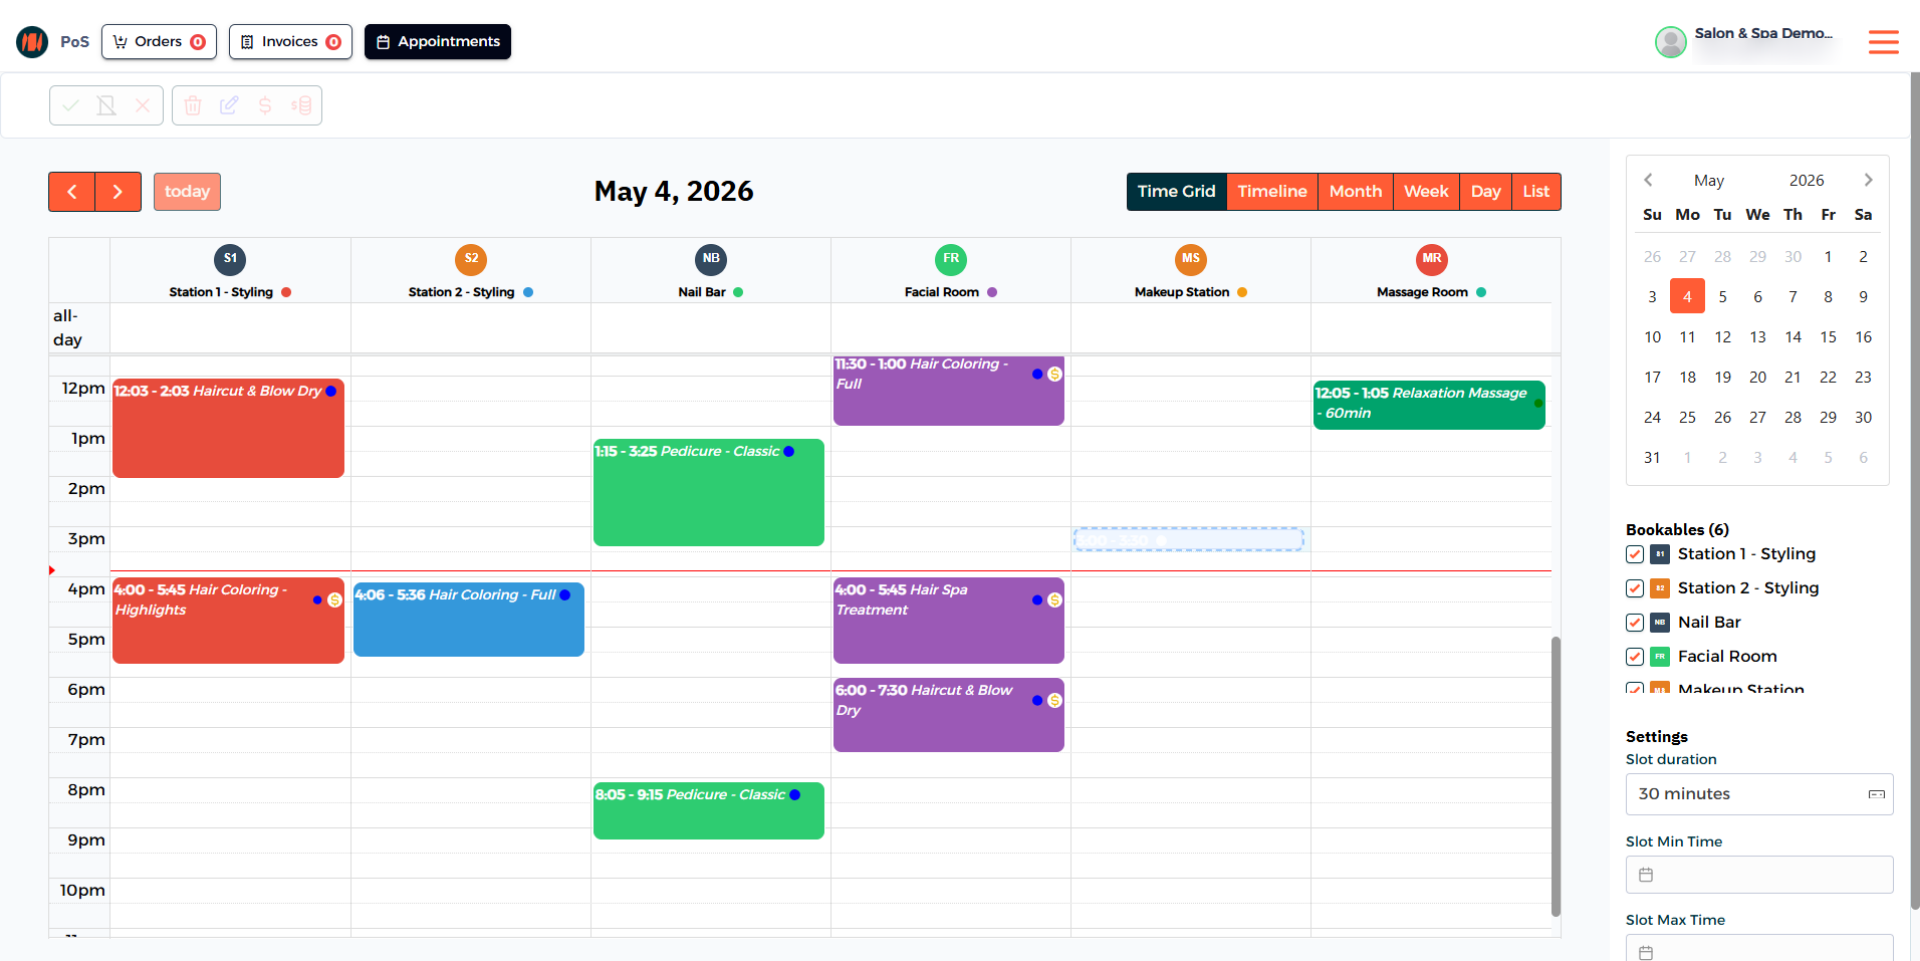
Step 4: Select an Available Slot for an Appointment
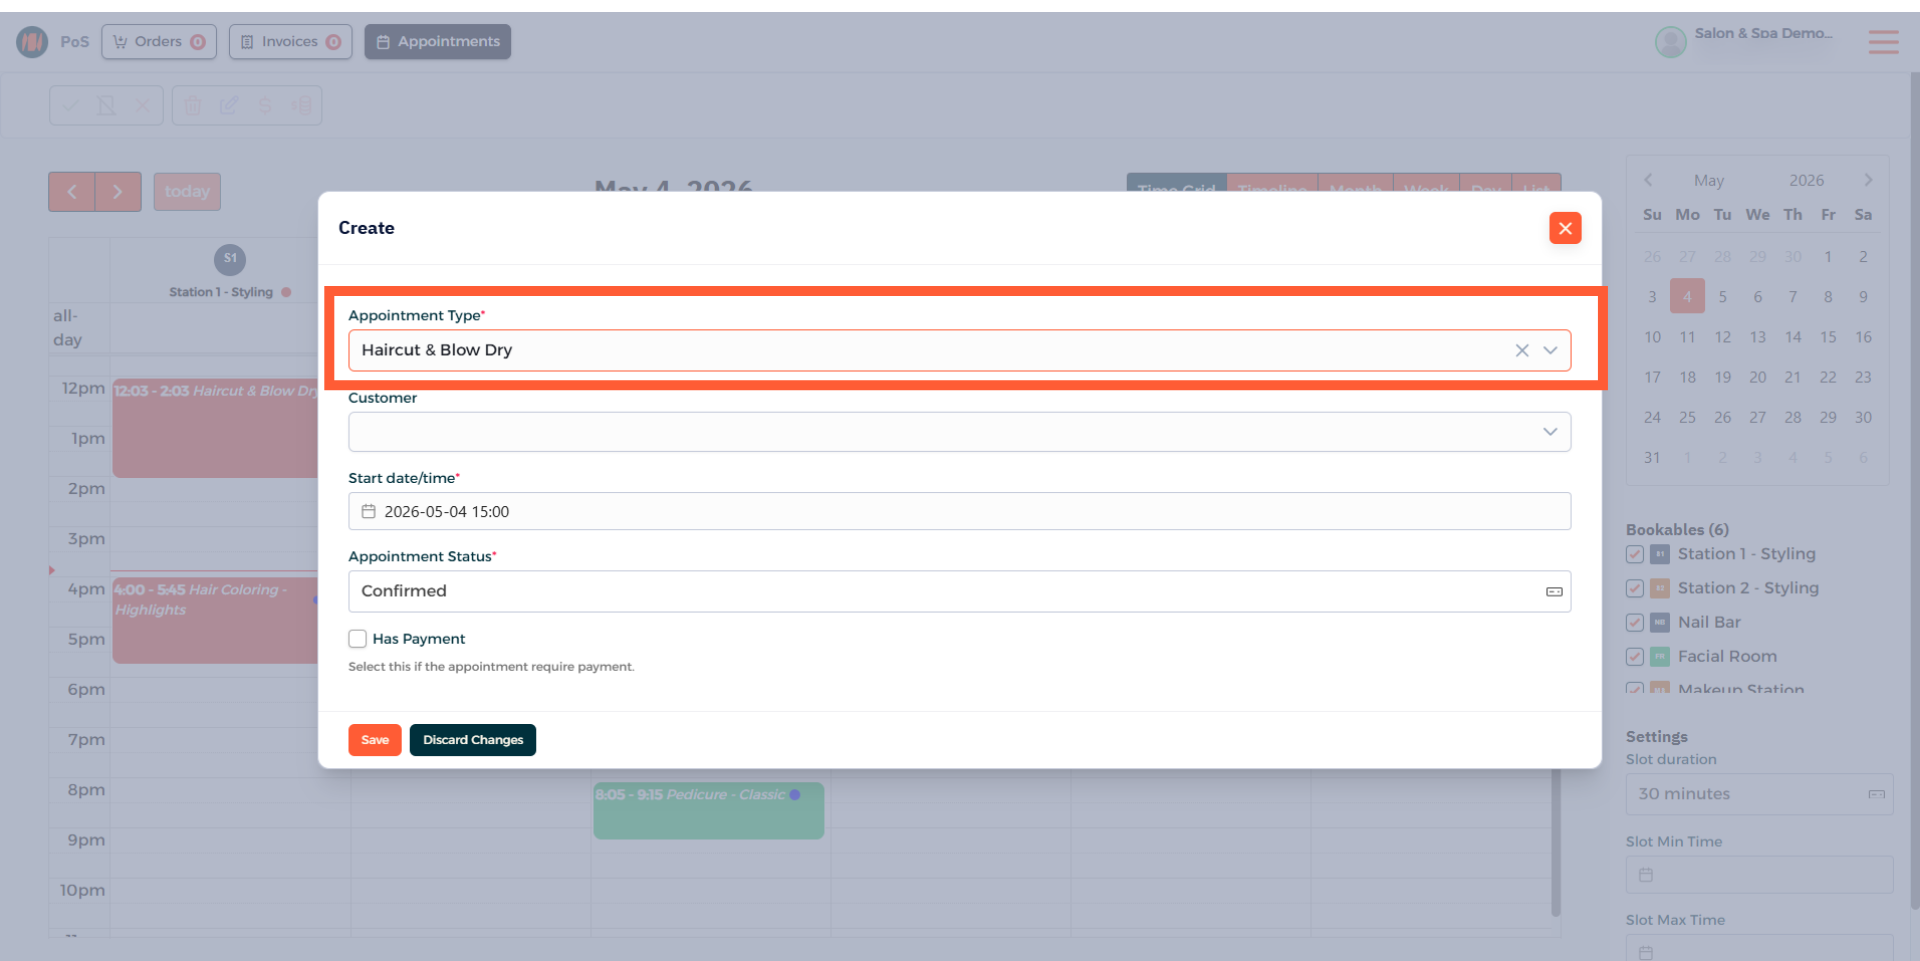
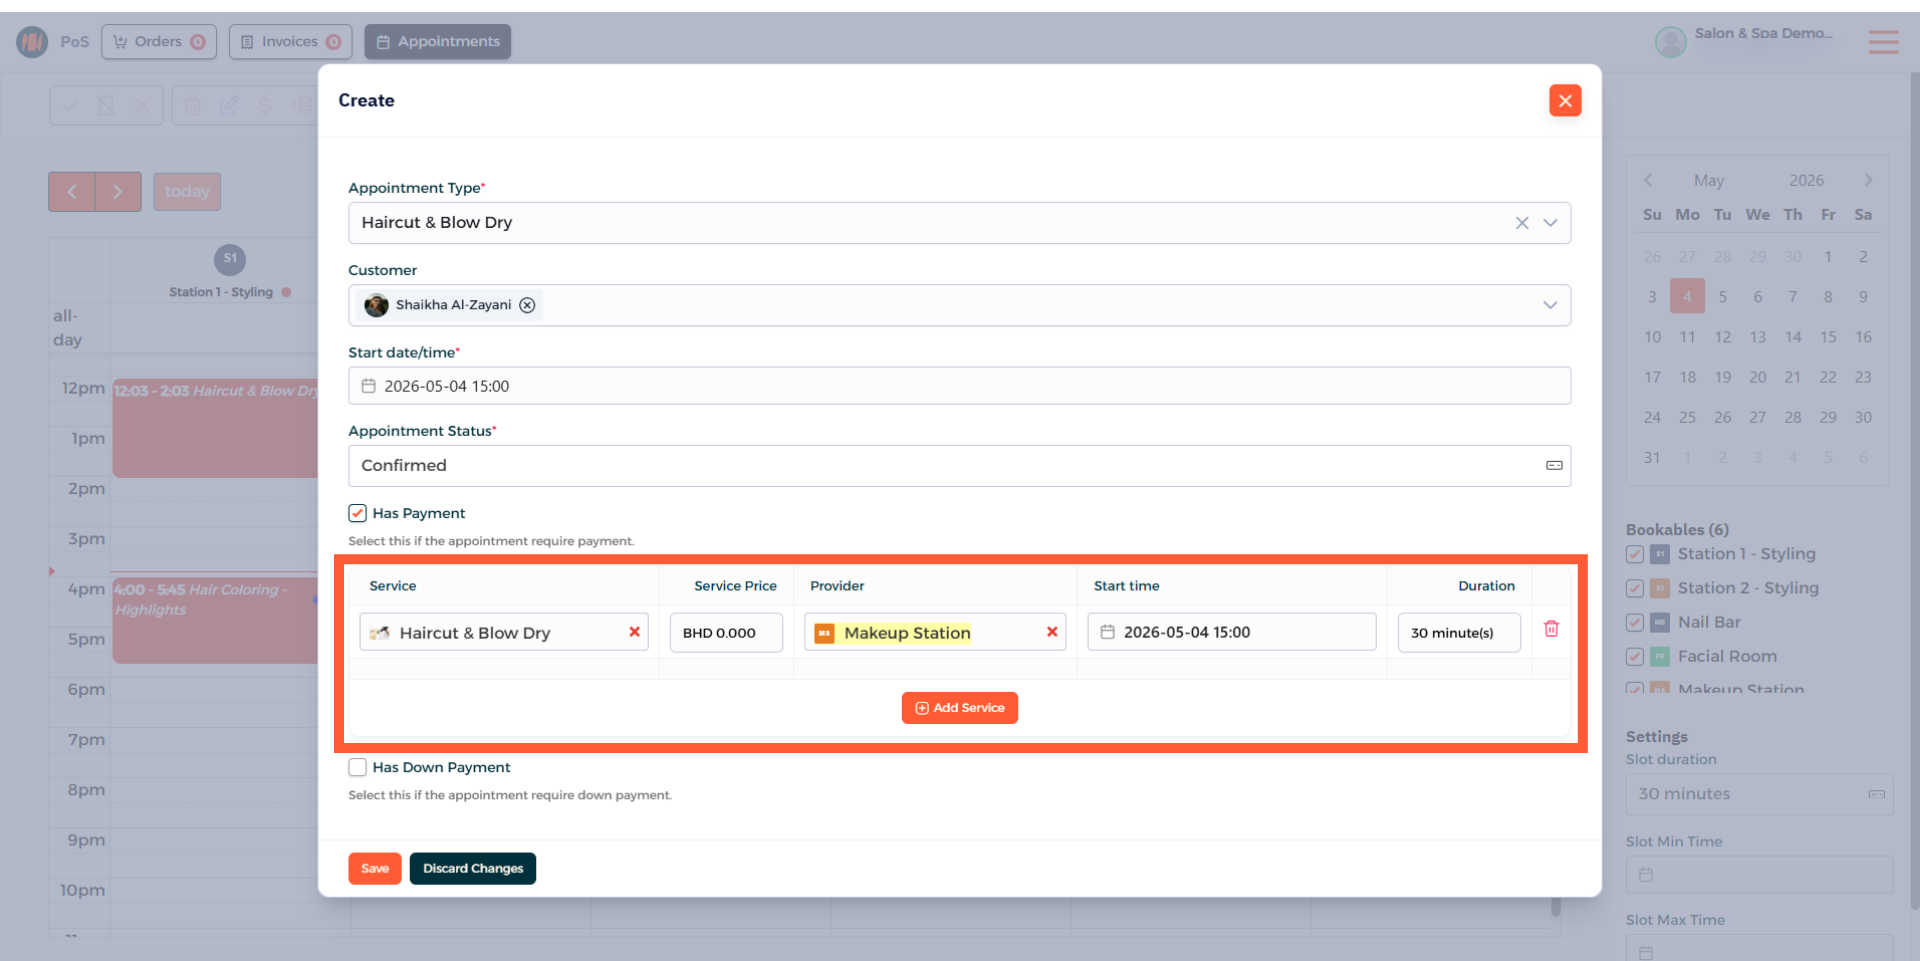
Step 5: Choose an Appointment Type
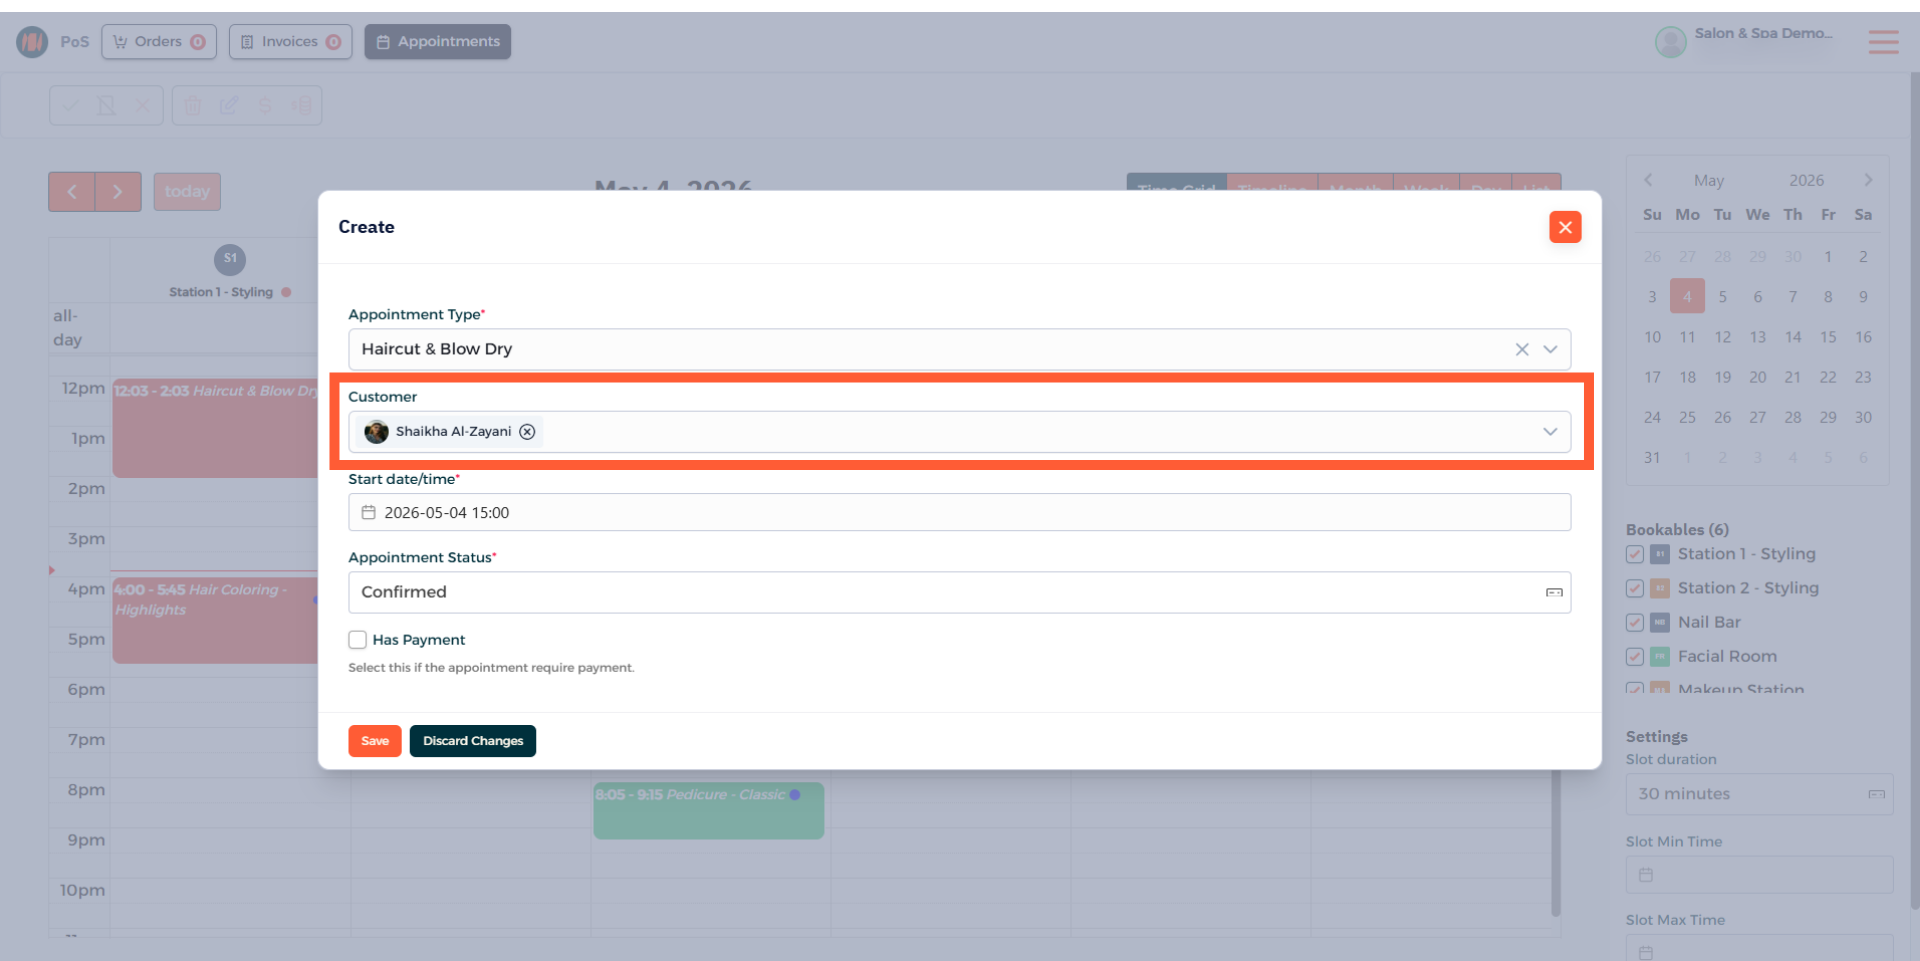
Step 6: Select a Customer
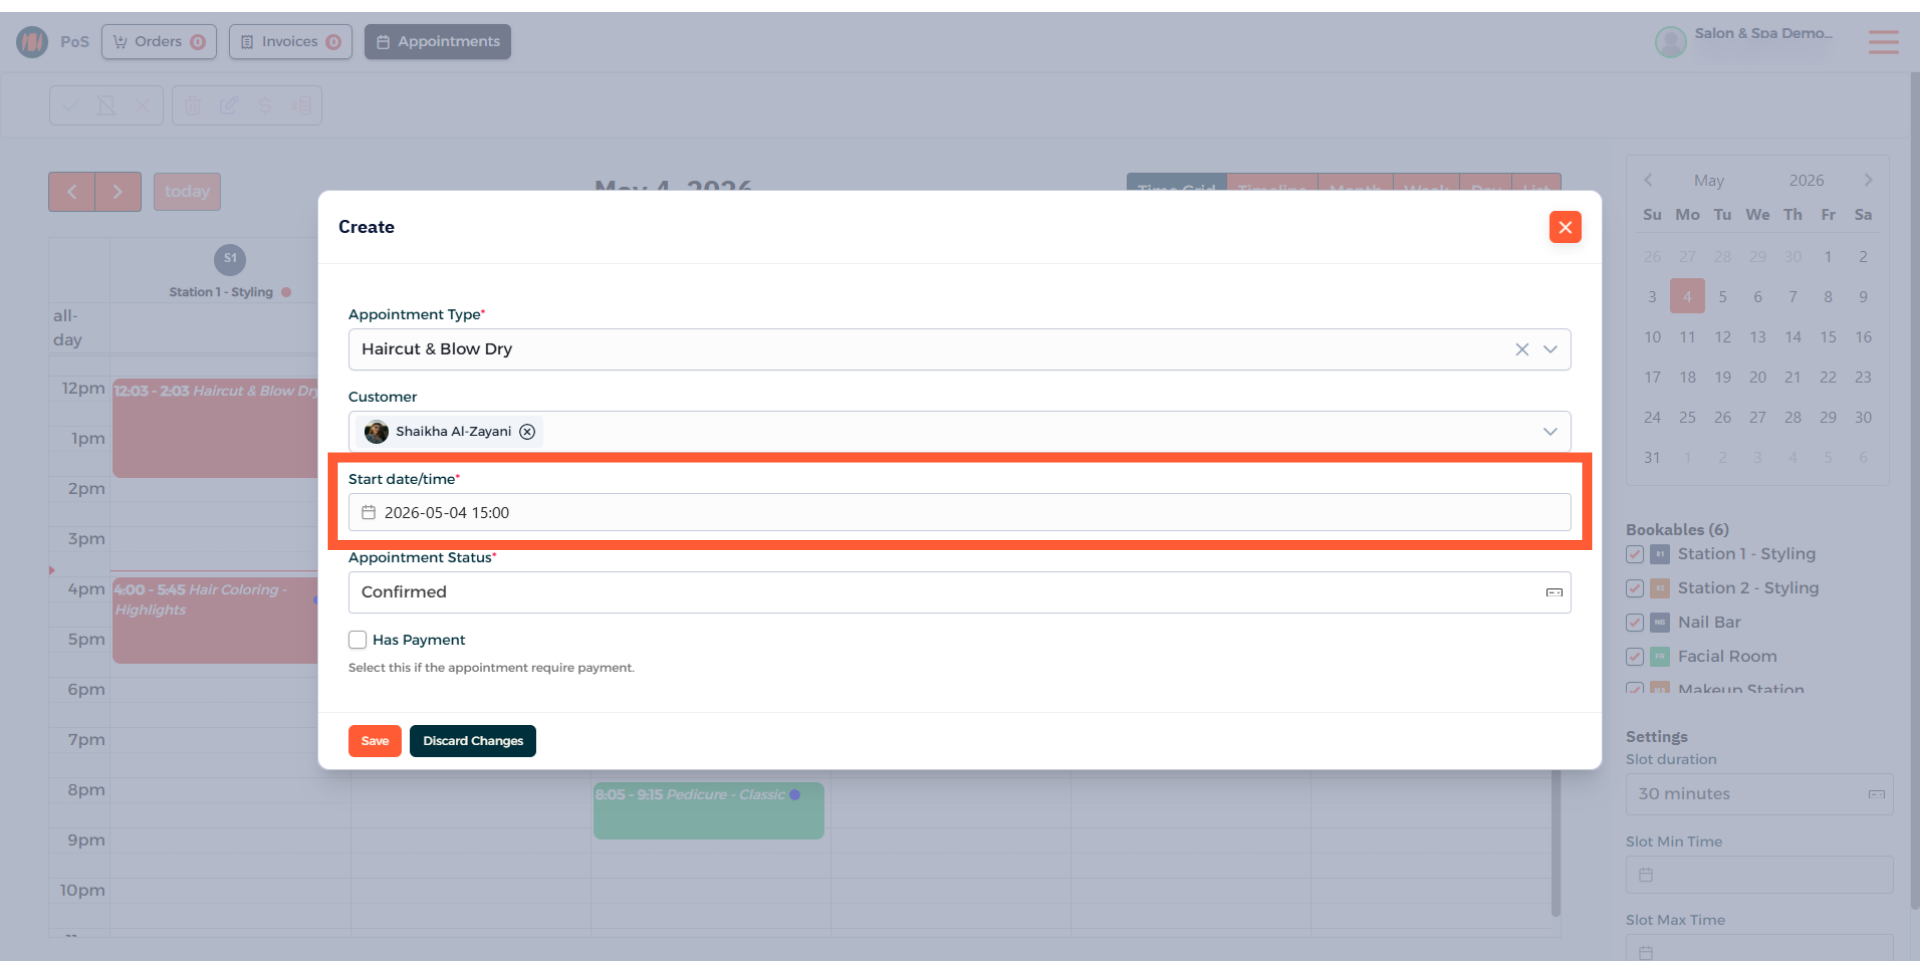
Step 7: Confirm Appointment Date and Time
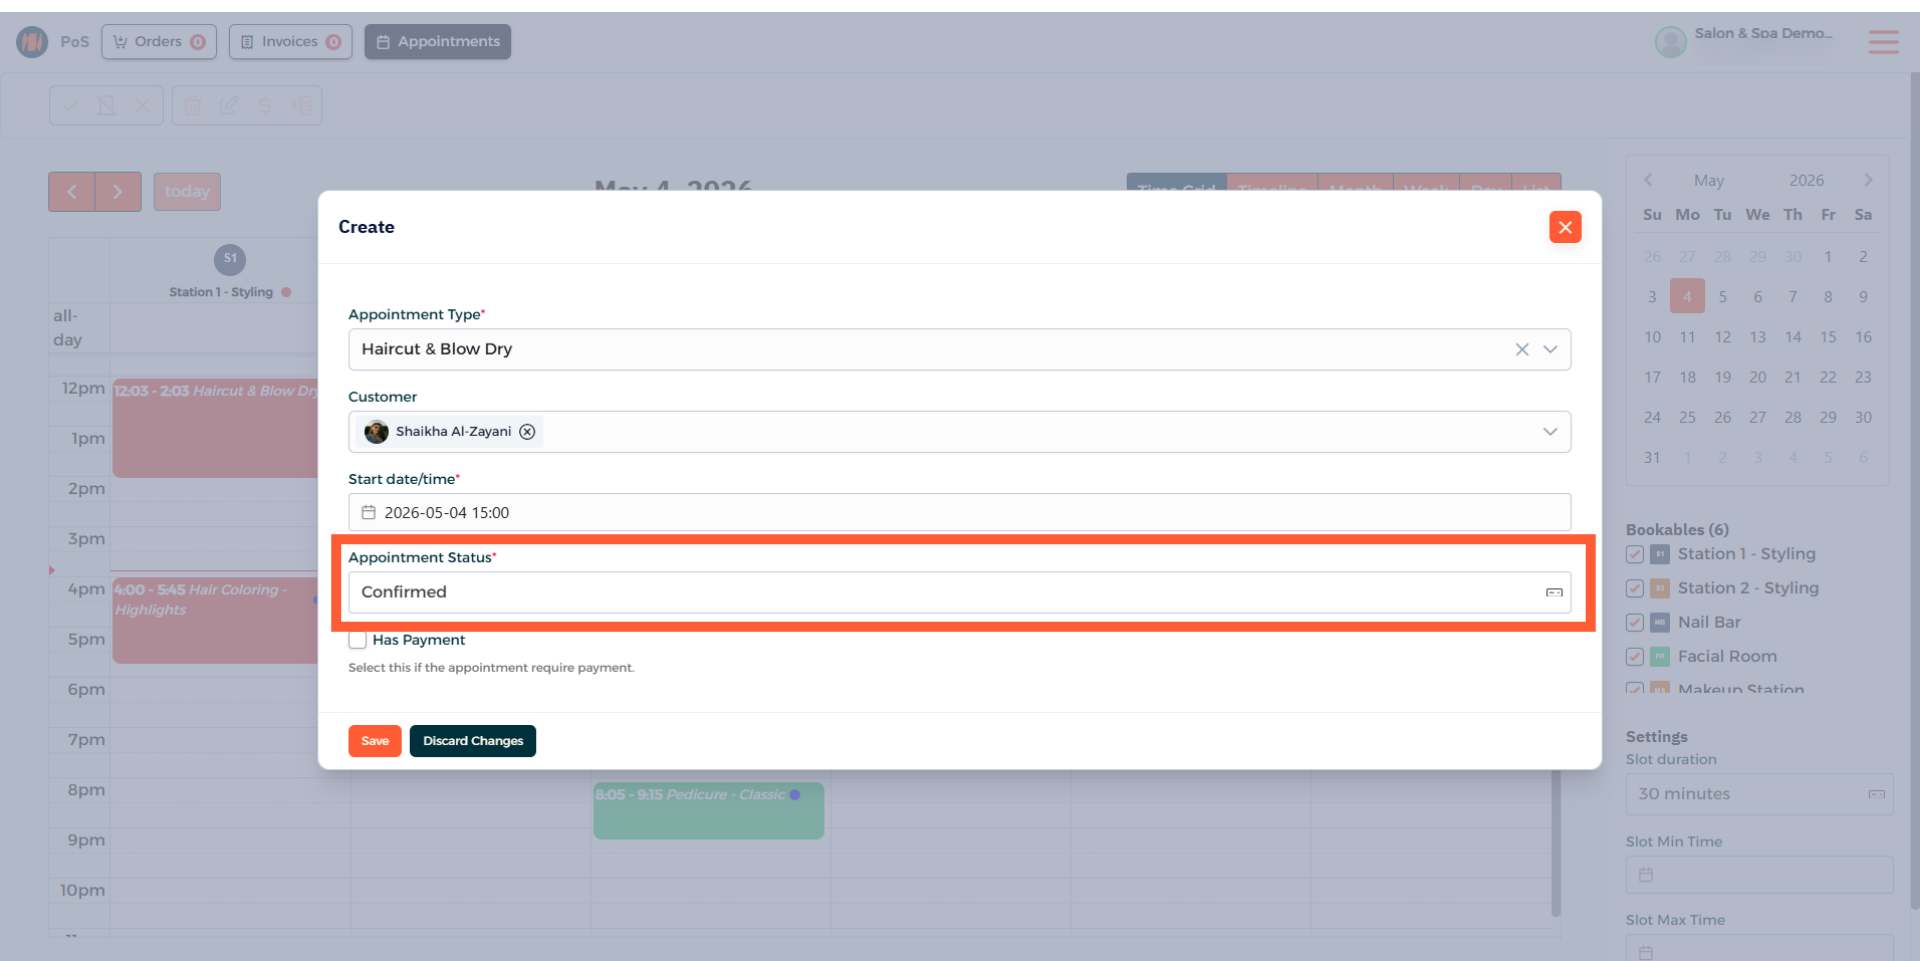
Step 8: Verify Appointment Status
Step 9: Add Services for Appointment
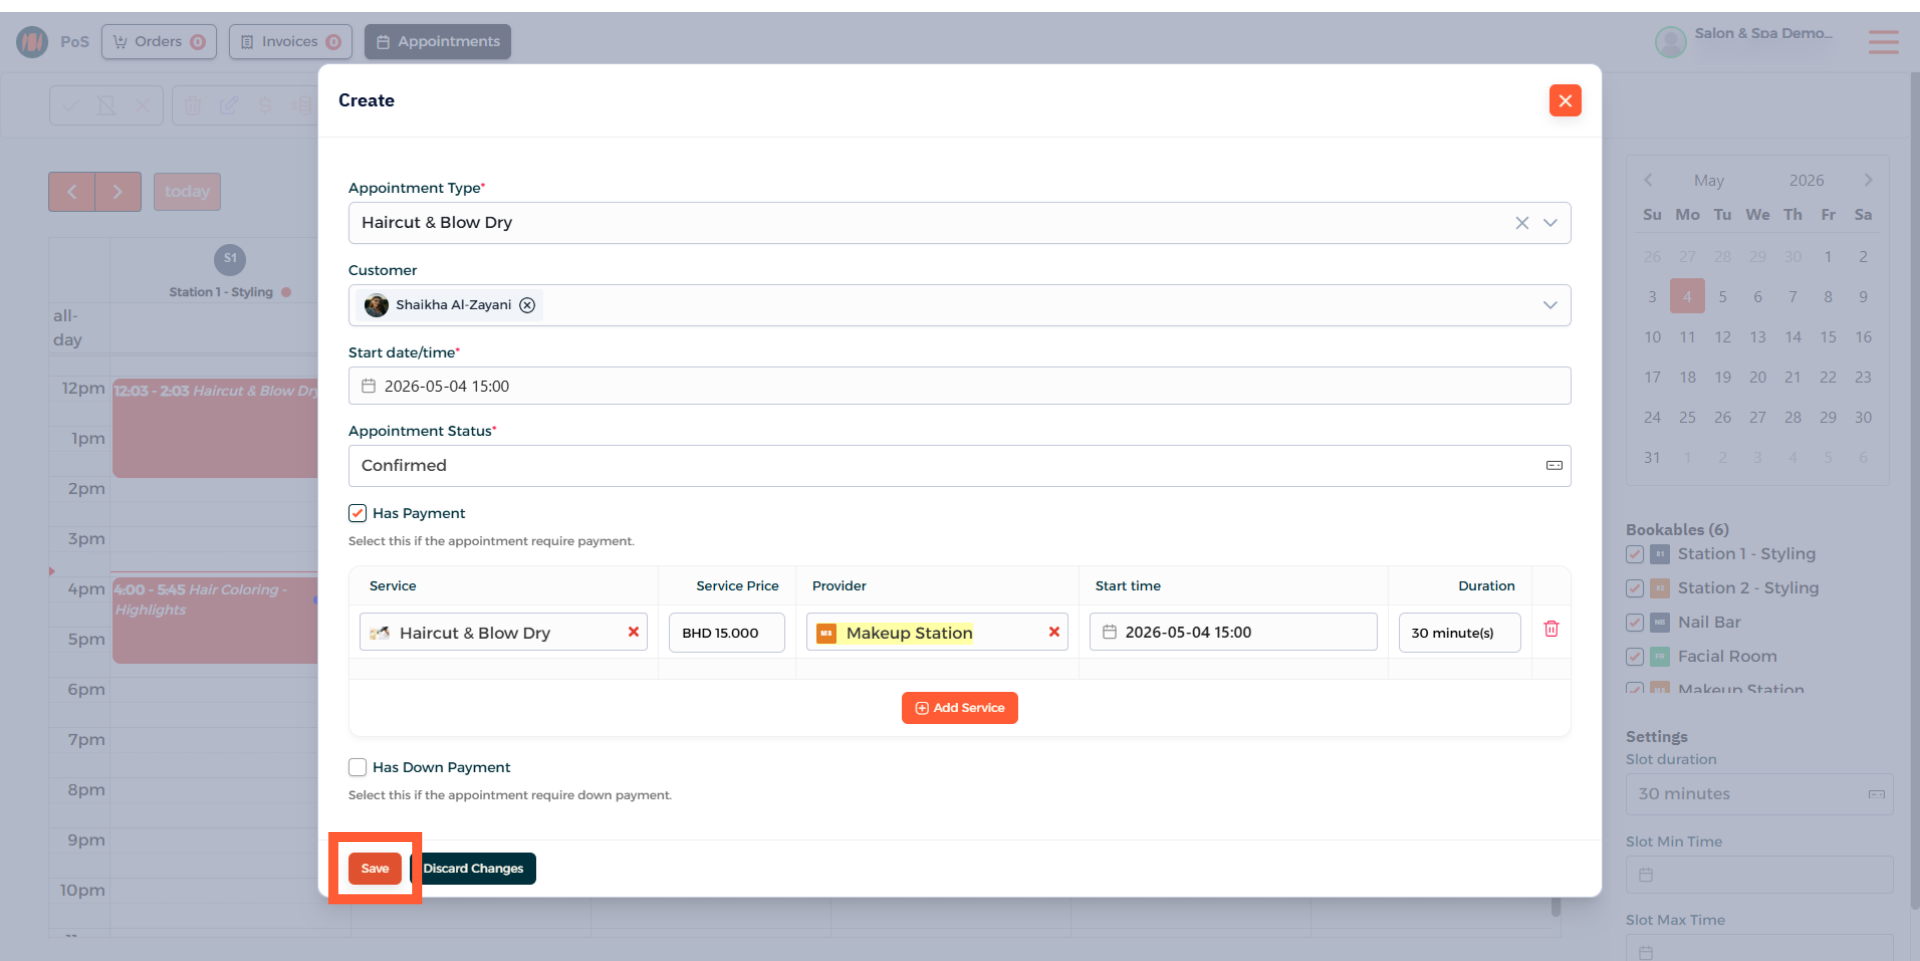
Step 10: Save Appointment Creation Details
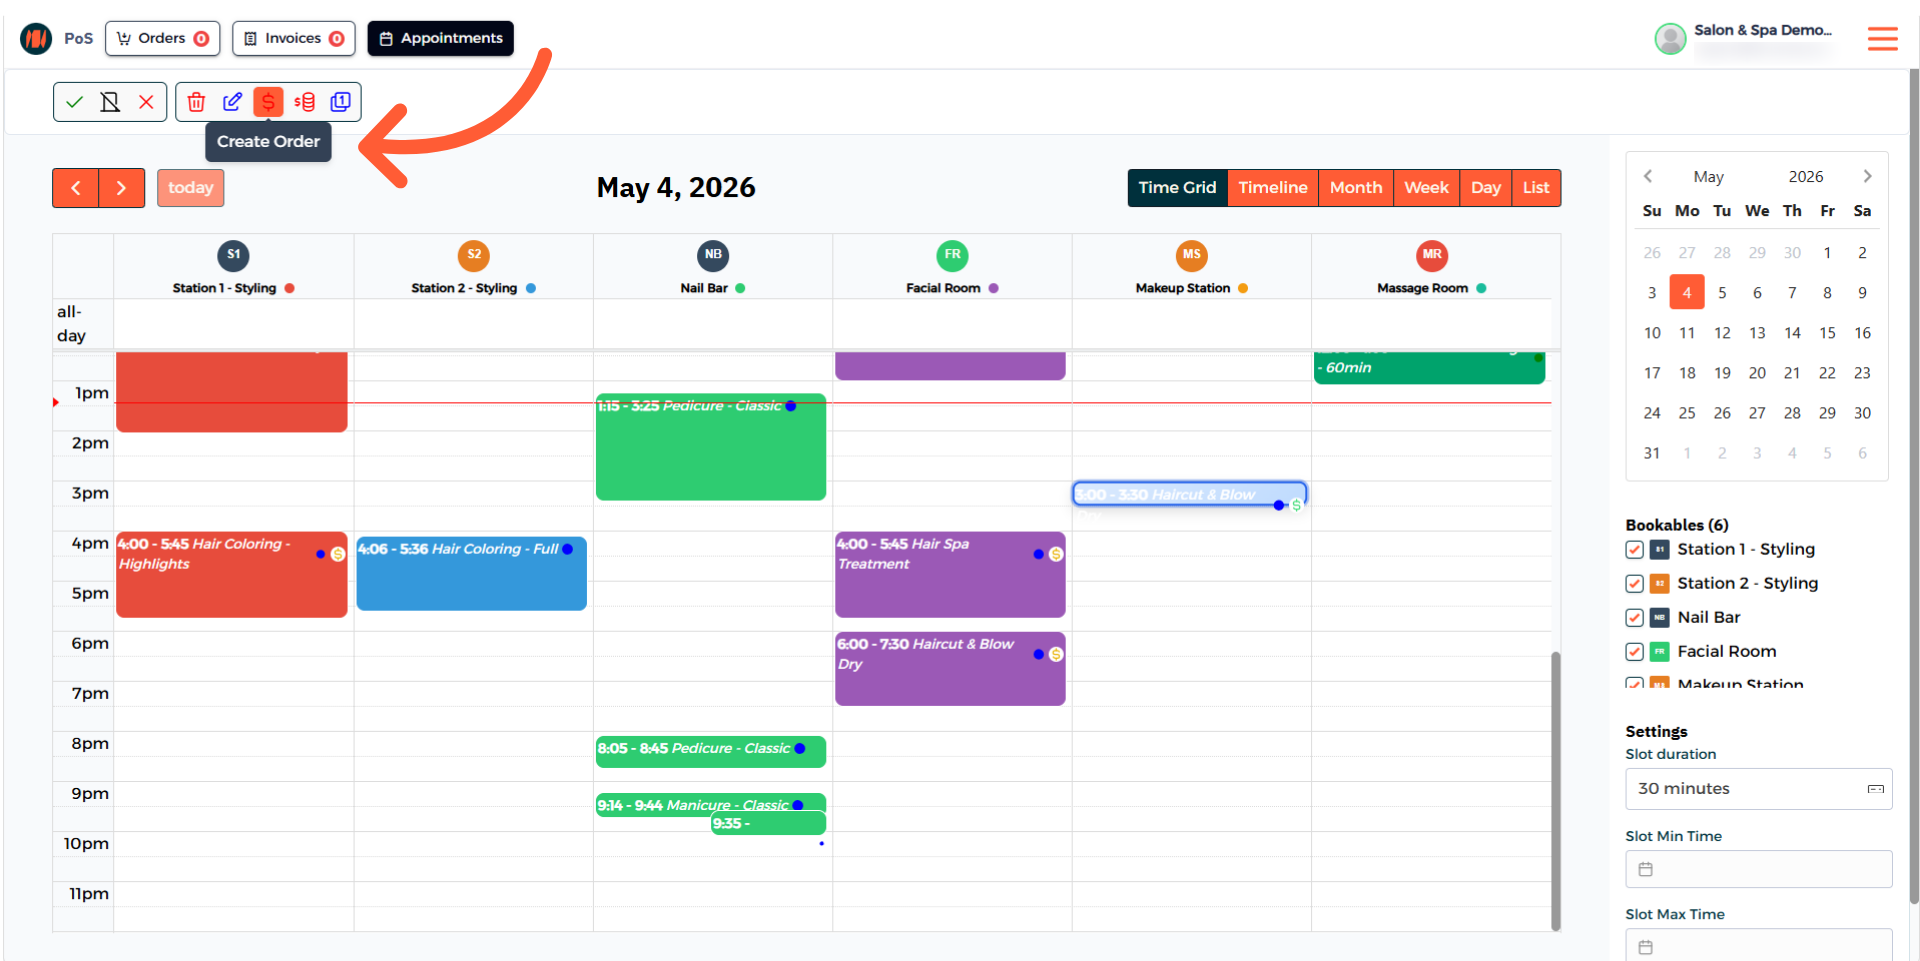
Step 11: Select Appointment and Create Order
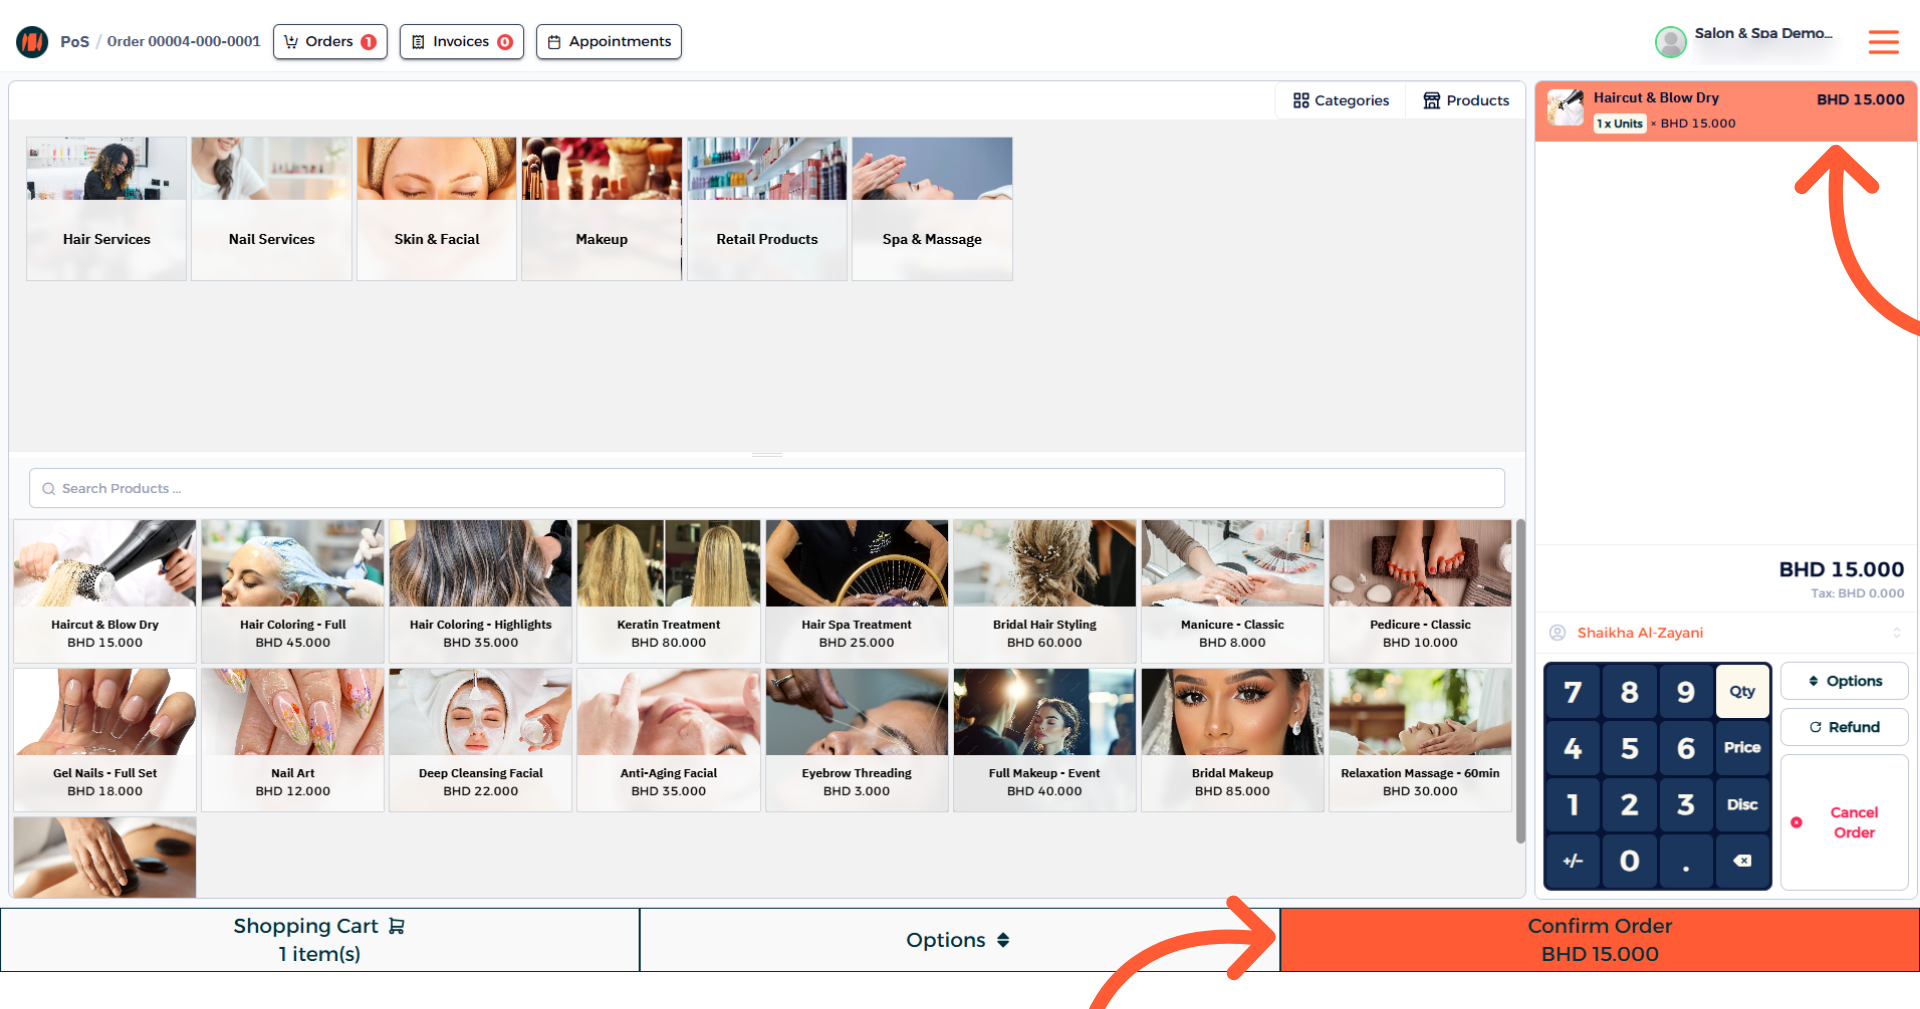
Step 12: Complete Order Process
That's it! You know now how to create an appointment in Invent ERP.
Notes & Tips
- Double-check the calendar slot you tap so the correct date and time are set.
- Confirm the customer contact and service details before saving to avoid issues.
Frequently Asked Questions (FAQ)
Q: How do I pick a date and time for an appointment?
A: Tap a calendar slot the date and time will be set automatically based on the slot you selected.
Q: Can I reschedule or move an appointment?
A: Yes, select the appointment and then enter the date and time to reschedule it.